
Windows XP has a great new look, but after a while, the new look can get old.With the help of some cool tools and tricks, you can change many parts of Windows XP.
Today I will guide you through customizing two parts of your computer, the boot screen and the Welcome/logon screen. You will learn how to replace the boring boot screen with premade screens and even how to make some of your own.
Customizing the Windows XP Boot Screen
Every time I turn on my computer, I am forced to stare at the boring Windows XP boot screen. Although, I must admit, I found the moving blue bars very amusing at first, after a few months, I became bored and wanted something different. Although changing the boot screen is not a
feature that the Windows XP team at Microsoft has built into Windows, doing so is still possible.
Changing the boot screen The image that is displayed during the boot is hidden away in a system file called ntoskrnl.exe. This system file is loaded during the system boot and is what displays the boot image and animation.
When users first started to make their own boot screens, they would use resource hacking tools
to hack into the file and replace the old Windows XP bitmap image file with one that they
made. Then, they would swap the old system file with the hacked version of the system file so
that the new boot screen would be displayed.
The majority of users do not start off by making their own boot screen. Instead, they download
one that someone else made from the Web. Unfortunately, the only way to distribute a boot
screen is to share the system file that the author has hacked from his or her system. This
method of distributing boot screens works for some people, but it may cause serious problems
for the majority of users.
The problems of changing the boot screen If you download a hacked system file with a new boot screen and replace the old file on your
computer, after you restart, you may find that your computer will not start and will give you a
nice error message. “C:\Windows\System32\ntoskrnl.exe is missing or corrupt.” Missing or
corrupt? Uh-oh. This is the most common problem that users experience when trying to
change their boot screen using the file swap technique.
Users that get this message, or any similar error message, are receiving it because they replaced
their system file with a file that is not compatible with their version of Windows XP.
How to safely change your boot screen Check out the following ways to change your boot screen by using special tools that will allow
you to do it safely.
Several different boot-screen-changing programs are available on the Web. Some of these programs are shareware and others are freeware. I have used them all. Not all of them have been user-friendly, and some of them have been an out-and-out pain. The one I prefer to use is
BootSkin by Stardock, which also happens to be free. This program is by far the easiest and
safest one to use to change the boot screen. Instead of replacing the system file, it just installs
a special driver that skins the boot. This arrangement does not impact system performance
and is a nice alternative to having to deal with system files.
You Can Download This tool from www.bootskin.com
Using BootSkin to change your boot screen Once you have the BootSkin application installed, start it up by using the link in the Start
menu under WinCustomize and perform the following steps:
1. Once you have the application running, changing the boot screen is very simple. Just
navigate through the list of boot screens by using the scrollbar arrows, as shown in image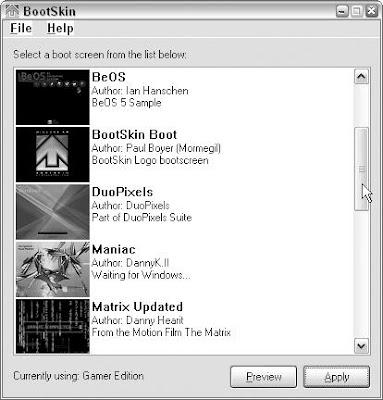
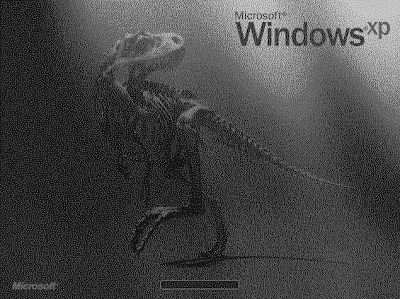
2. Once you find the boot screen that you like, click the item and then click the Preview
button to see a full-screen animated preview of what the boot screen will look like.
3. Click a button on the mouse again to exit the full-screen preview. If you like the boot
screen, then click the Apply button. That’s it!
Once you reboot, your new boot screen will be displayed every time. If you would like to
change your boot screen back to the default Windows XP boot screen, reopen the BootSkin
program and select the default system boot screen from the top of the list; click Apply.
Where to get more boot screens for BootSkin
Want more boot screens that will work with BootSkin? The following are two sites where you
can find more skins that are already compatible with the program.
Win Customize: www.wincustomize.com/skins.asp?library=32
Skinbase: www.skinbase.org/section.php?sections=BootSkin
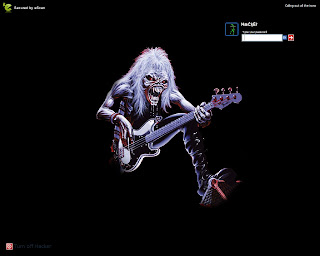
Customizing the Logon Screen Windows XP has introduced a great new way to log on to your computer, known as the
Welcome screen. The new Welcome screen provides a refined method to log on compared to the
old boring Windows 2000 logon screen. Not only does the new screen look good, but users can
now see all of the users set up on the machine and can easily log on by clicking the user’s name.
If You want to change the login screen you can download style xp tool from this link http://www.softpedia.com/get/Desktop-Enhancements/Themes/Style-XP.shtml
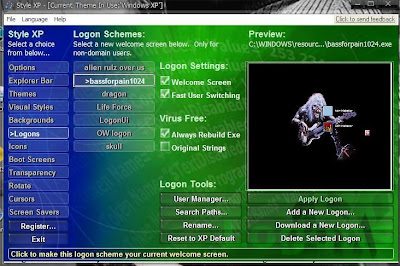
This tool is very good for customizing windows xp it can change windows appearance, logon screen, boot screen, explorer bar, themes e.t.c you can download thousands of logon screen from these two sites
ThemeXP: www.themexp.org/cat_login.php
Belchfire : www.belchfire.net/showgallery-6.html
After the downloading login screen you have to use style xp in style xp click on Logons tab than click on add a new logon and locate the pasth where you download logon screen after selecting click on apply logon this can change your window logon screen....
Every time I turn on my computer, I am forced to stare at the boring Windows XP boot screen. Although, I must admit, I found the moving blue bars very amusing at first, after a few months, I became bored and wanted something different. Although changing the boot screen is not a
feature that the Windows XP team at Microsoft has built into Windows, doing so is still possible.
Changing the boot screen The image that is displayed during the boot is hidden away in a system file called ntoskrnl.exe. This system file is loaded during the system boot and is what displays the boot image and animation.
When users first started to make their own boot screens, they would use resource hacking tools
to hack into the file and replace the old Windows XP bitmap image file with one that they
made. Then, they would swap the old system file with the hacked version of the system file so
that the new boot screen would be displayed.
The majority of users do not start off by making their own boot screen. Instead, they download
one that someone else made from the Web. Unfortunately, the only way to distribute a boot
screen is to share the system file that the author has hacked from his or her system. This
method of distributing boot screens works for some people, but it may cause serious problems
for the majority of users.
The problems of changing the boot screen If you download a hacked system file with a new boot screen and replace the old file on your
computer, after you restart, you may find that your computer will not start and will give you a
nice error message. “C:\Windows\System32\ntoskrnl.exe is missing or corrupt.” Missing or
corrupt? Uh-oh. This is the most common problem that users experience when trying to
change their boot screen using the file swap technique.
Users that get this message, or any similar error message, are receiving it because they replaced
their system file with a file that is not compatible with their version of Windows XP.
How to safely change your boot screen Check out the following ways to change your boot screen by using special tools that will allow
you to do it safely.
Several different boot-screen-changing programs are available on the Web. Some of these programs are shareware and others are freeware. I have used them all. Not all of them have been user-friendly, and some of them have been an out-and-out pain. The one I prefer to use is
BootSkin by Stardock, which also happens to be free. This program is by far the easiest and
safest one to use to change the boot screen. Instead of replacing the system file, it just installs
a special driver that skins the boot. This arrangement does not impact system performance
and is a nice alternative to having to deal with system files.
You Can Download This tool from www.bootskin.com
Using BootSkin to change your boot screen Once you have the BootSkin application installed, start it up by using the link in the Start
menu under WinCustomize and perform the following steps:
1. Once you have the application running, changing the boot screen is very simple. Just
navigate through the list of boot screens by using the scrollbar arrows, as shown in image

2. Once you find the boot screen that you like, click the item and then click the Preview
button to see a full-screen animated preview of what the boot screen will look like.
3. Click a button on the mouse again to exit the full-screen preview. If you like the boot
screen, then click the Apply button. That’s it!
Once you reboot, your new boot screen will be displayed every time. If you would like to
change your boot screen back to the default Windows XP boot screen, reopen the BootSkin
program and select the default system boot screen from the top of the list; click Apply.
Where to get more boot screens for BootSkin
Want more boot screens that will work with BootSkin? The following are two sites where you
can find more skins that are already compatible with the program.
Win Customize: www.wincustomize.com/skins.asp?library=32
Skinbase: www.skinbase.org/section.php?sections=BootSkin

Customizing the Logon Screen Windows XP has introduced a great new way to log on to your computer, known as the
Welcome screen. The new Welcome screen provides a refined method to log on compared to the
old boring Windows 2000 logon screen. Not only does the new screen look good, but users can
now see all of the users set up on the machine and can easily log on by clicking the user’s name.
If You want to change the login screen you can download style xp tool from this link http://www.softpedia.com/get/Desktop-Enhancements/Themes/Style-XP.shtml

This tool is very good for customizing windows xp it can change windows appearance, logon screen, boot screen, explorer bar, themes e.t.c you can download thousands of logon screen from these two sites
ThemeXP: www.themexp.org/cat_login.php
Belchfire : www.belchfire.net/showgallery-6.html

After the downloading login screen you have to use style xp in style xp click on Logons tab than click on add a new logon and locate the pasth where you download logon screen after selecting click on apply logon this can change your window logon screen....

0 comments:
Post a Comment