IP

HACKING IS NOT A CRIME FOR US COZ WE ARE ETHICAL HACKER. DON'T USE THIS BLOG MATERIAL TO CONDUCT A CRIME.THIS SITE's CONTENTS ARE ONLY FOR EDUCATIONAL PURPOSE.....

Guest To Admin Hack

Sunday, February 21, 2010


Hii guys today I’m going to tell you some basic tips of hacking, you got a Pc in which you got Guest a/c open and don’t know the password of Administrator A/c and you getting frustrated while doing work in the guest or limited privilege a/c .

Want to be a powerful like Administrator and break the all limitation of limited a/c user just do these simple steps:

1: Login to the system via guest a/c.

2: Open the %windir\system32 and copy the cmd file to desktop.

3: Now rename this File with sethc.exe and copy this file back to the %windir\system32 directory.

Now you have been asked for file replacing click on yes button than you got the error message that this file can’t be copied.

4: Now you have to logoff, at the login screen press shift key for 4 or 5 times and then you got the command window there you have to type this command.

NET USER ADMINISTRATOR Password and press the enter key.

Here Administrator is the user name which you want to hack and password is where you put your password for this user…..


ReaD MorE

Customizing The Look of The Startup

Windows XP has a great new look, but after a while, the new look can get old.With the help of some cool tools and tricks, you can change many parts of Windows XP.

Today I will guide you through customizing two parts of your computer, the boot screen and the Welcome/logon screen. You will learn how to replace the boring boot sc
reen with premade screens and even how to make some of your own.

Customizing the Windows XP Boot Screen

Every time I turn on my computer, I am forced to stare at the boring Windows XP boot screen. Although, I must admit, I found the moving blue bars very amusing at first, after a few months, I became bored and wanted something different. Although changing the boot screen is not a
feature that the Windows XP team at Microsoft has built into Windows, doing so is still possible.

Changing the boot screen The image that is displayed during the boot is hidden away in a system file called ntoskrnl.exe. This system file is loaded during the system boot and is what displays the boot image and animation.

When users first started to make their own boot screens, they would use resource hacking tools
to hack into the file and replace the old Windows XP bitmap image file with one that they
made. Then, they would swap the old system file with the hacked version of the system file so
that the new boot screen would be displayed.

The majority of users do not start off by making their own boot screen. Instead, they download
one that someone else made from the Web. Unfortunately, the only way to distribute a boot
screen is to share the system file that the author has hacked from his or her system. This
method of distributing boot screens works for some people, but it may cause serious problems
for the majority of users.

The problems of changing the boot screen If you download a hacked system file with a new boot screen and replace the old file on your
computer, after you restart, you may find that your computer will not start and will give you a
nice error message. “C:\Windows\System32\ntoskrnl.exe is missing or corrupt.” Missing or
corrupt? Uh-oh. This is the most common problem that users experience when trying to
change their boot screen using the file swap technique.

Users that get this message, or any similar error message, are receiving it because they replaced
their system file with a file that is not compatible with their version of Windows XP.

How to safely change your boot screen Check out the following ways to change your boot screen by using special tools that will allow
you to do it safely.

Several different boot-screen-changing programs are available on the Web. Some of these programs are shareware and others are freeware. I have used them all. Not all of them have been user-friendly, and some of them have been an out-and-out pain. The one I prefer to use is
BootSkin by Stardock, which also happens to be free. This program is by far the easiest and
safest one to use to change the boot screen. Instead of replacing the system file, it just installs
a special driver that skins the boot. This arrangement does not impact system performance
and is a nice alternative to having to deal with system files.

You Can Download This tool from www.bootskin.com

Using BootSkin to change your boot screen Once you have the BootSkin application installed, start it up by using the link in the Start
menu under WinCustomize and perform the following steps:

1. Once you have the application running, changing the boot screen is very simple. Just
navigate through the list of boot screens by using the scrollbar arrows, as shown in image

2. Once you find the boot screen that you like, click the item and then click the Preview
button to see a full-screen animated preview of what the boot screen will look like.

3. Click a button on the mouse again to exit the full-screen preview. If you like the boot
screen, then click the Apply button. That’s it!

Once you reboot, your new boot screen will be displayed every time. If you would like to
change your boot screen back to the default Windows XP boot screen, reopen the BootSkin
program and select the default system boot screen from the top of the list; click Apply.

Where to get more boot screens for BootSkin

Want more boot screens that will work with BootSkin? The following are two sites where you
can find more skins that are already compatible with the program.

Win Customize: www.wincustomize.com/skins.asp?library=32
Skinbase: www.skinbase.org/section.php?sections=BootSkin


Customizing the Logon Screen Windows XP has introduced a great new way to log on to your computer, known as the
Welcome screen. The new Welcome screen provides a refined method to log on compared to the
old boring Windows 2000 logon screen. Not only does the new screen look good, but users can
now see all of the users set up on the machine and can easily log on by clicking the user’s name.

If You want to change the login screen you can download style xp tool from this link http://www.softpedia.com/get/Desktop-Enhancements/Themes/Style-XP.shtml

This tool is very good for customizing windows xp it can change windows appearance, logon screen, boot screen, explorer bar, themes e.t.c you can download thousands of logon screen from these two sites

ThemeXP: www.themexp.org/cat_login.php
Belchfire : www.belchfire.net/showgallery-6.html

After the downloading login screen you have to use style xp in style xp click on Logons tab than click on add a new logon and locate the pasth where you download logon screen after selecting click on apply logon this can change your window logon screen....
ReaD MorE

Hide Hard Drive Partition

Friday, February 19, 2010


Guys Here is a cool technique which hides entire hard disk drive partitions by a simple procedure without using Regedit this is the best security tip from unauthorised users :

1: Go to Start ----> Run and Type Diskpart.

A Dos Window will appear with following description.

DISKPART>

2:
Then type list volume

3:
Suppose You Want to hide drive E:

Type select volume 3.
A message will now appear in the window saying "Volume 3 is the selected volume".

4:
Now Type remove letter E You may have to reboot the computer.

Diskpart will remove the letter. Since Windows XP doesn't have the capability to identify the unknown volume, it won't display or show results from it. To access the contents of the hidden drive, repeat the process, but in the fourth step, replace remove to assign, i.e.

assign letter E.

Or here is another way too to hide drive:

1:
Go to Start ----> Run and Type compmgmt.msc. this will open computer management.

2: Navigate To Computer Management\Storage\Disk Management
.
3: Here you right click on drive which you want to hide and select Change Drive Letter And Paths.

4: A dialogue Box appear showing the drive letter of the drive partition you have to click on Remove Button than permitt it.

This Will Remove your Drive letter and hide your drive..

To access the contents of the hidden drive, repeat the process, but in the fourth step you have to click on add button than assign the drive letter this will show your drive again......
ReaD MorE

Add "Insert" Option To CD Drive Context Menu

Here is the step by step procedure: 1: Download the file cdeject.rar from this link

http://www.4shared.com/file/225294861/afa32c9/cdeject.html
extract it and copy the DLL file to the %windir%\System32 Folder. 2: Copy The Following Code into Notepad:
Windows Registry Editor Version 5.00

[HKEY_CLASSES_ROOT\CLSID\{02A07E80-EFA2-11D4-8306-A7EBD4C50C7C}]
@="CDEject Context Menu Shell Extension"

[HKEY_CLASSES_ROOT\CLSID\{02A07E80-EFA2-11D4-8306-A7EBD4C50C7C}\InprocServer32]
@="C:\\WINDOWS\\system32\\cdeject.dll"
"ThreadingModel"="Apartment"

[HKEY_CLASSES_ROOT\Drive\shellex\ContextMenuHandlers\{02a07e80-efa2-11d4-8306-a7ebd4c50c7c}]
@="{02a07e80-efa2-11d4-8306-a7ebd4c50c7c}"

3: Save the file with any name, but the extension must be .reg.

4:
Run the file; it'll ask for permission Grant it.

5: You'll now get the Insert option in the CD drive context menu!
ReaD MorE

Create a Special Folder In Windows Explorer


How can you create a folder like My Documents—one that will appear as a system folder in XP?

Here’s how to create a custom folder in My Computer, one that can’t be deleted or renamed.

*Step 1:
In the Registry Editor, navigate to
HKEY_CLASSES_ROOT\CLSID. Create a new
key with a Globally Unique Identifier
(GUID). The GUID is a 128-bit identifier that
is usually generated by Windows. This can
be a random number that is used to
uniquely identify COM objects. Create a key
using this random GUID:
{FD4DF9E0-E3DE-11CE-BFCFABCD1DE12345}

*Step 2:

Set the value of the “(Default)” setting for
this key to the name of the folder, say “My
Personal Data”. Create a new sub-key under
the main key and call it “DefaultIcon”. That
is, create a key called:
HKEY_CLASSES_ROOT\CLSID\{FD4DF9E0-E3DE-11CE-BFCF ABCD1DE12345}\DefaultIcon
Set the value of “(DefaultIcon)”to the
filename and path of the icon file you want
to use for the folder, for example,
“C:\Topsec.ico”, without the quotes.
If you don’t specify a path to an icon
file, Windows will use its default folder icon
instead.

*Step 3:
Create another sub-key under the main key
called “InprocServer32”, that is, create the
key called
HKEY_CLASSES_ROOT\CLSID\{FD4DF9E0-
E3DE-11CE-BFCFABCD1DE12345}\
InprocServer32
Set the “(default)” setting here to
“shell32.dll”. Create another string value
called ThreadingModel and set its value to
“Apartment”. There’s one more: create
another sub-key called
HKEY_CLASSES_ROOT\CLSID\{FD4DF9E0-
E3DE-11CE-BFCFABCD1DE12345}\
Shell\Open MyFolder\Command
Set the “(Default)” value here to the
command that should be executed when
the folder is clicked. In this case, it would
be “explorer /root,c:\My Personal Data”.

*Step 4:

There’s more keys to be created:
HKEY_CLASSES_ROOT\CLSID\{FD4DF9E0-
E3DE-11CE-BFCF-ABCD1DE12345}\ShellEx\
PropertySheetHandlers\{FD4DF9EO-E3DE-
11CE-BFCF-ABCD1DE12345} and
HKEY_CLASSES_ROOT\CLSID\{FD4DF9E0-
E3DE-11CE-BFCFABCD1DE12345}\
ShellFolder. Under this
key, create a new binary value called
“Attributes” with the value “00 00 00 00”.

*Step 5:

To place the folder in My Computer, add the
original key to
HKEY_LOCAL_MACHINE\SOFTWARE\Microsoft\
Windows\CurrentVersion\Explorer\
MyComputer\Namespace\

So the key value will be

HKEY_LOCAL_MACHINE\SOFTWARE\Microsoft\
Windows\CurrentVersion\Explorer\
MyComputer\Namespace\{FD4DF9E0-
E3DE-11CE-BFCF-ABCD1DE12345}

Now go to My Computer, and you’ll see a new custom folder!
ReaD MorE

Useful Run Commands

Thursday, February 18, 2010


What useful Commands can you type into your computer run window?

Applies to Windows Vista and Windows XP

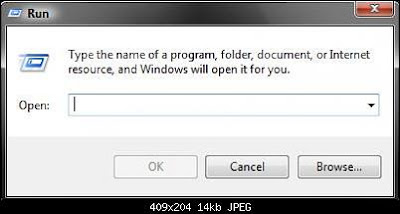
The Windows Run command dialog box is an extremely useful tool as it can open just about anything you want. You just have to know the special commands to type in. If you are "in to" computers you will become attached to these commands as they access files faster than having to open it manually. The Windows Run box window will also give you access to hidden files, settings, and programs that cannot be seen in the Windows control panel.

Some of my favorite commands you can type into a run box are:

*regedit - This brings up the Windows registry and lets you change settings. Be warned, changing settings in the registry can cause your computer to simply stop working.

*gpedit.msc - This is to access the Windows group policy where you can change more interesting settings. (this can cause your computer to stop working also)

*cmd - If you type this it will bring up Command Prompt.

*taskmgr - If you can't use your keyboard to press CTRL ALT DEL typing taskmgr will being up the task manger.

*wab - Type this and it will take you to the Outlook Express email address book.

*msconfig - This is where you stop programs from opening when you start Windows.

*... - Yes it's just three dots away from my computer

*recent - Shows recent documents...

How to get to the Windows run box so you can type in commands:

1: You can get to the RUN dialog box by pressing the Windows key and R.

OR

2: In Windows XP go to Start Button and open Run from there.
In Windows Vista go to the start icon in the left corner and when the start menu appears type in the bar at the bottom.

*In Windows Vista you can type run in the bar in the start menu, then press enter and the run box will appear.


*Command - Opens a Command Window (dos).

*Networking commands:-

*mstsc - Brings up a Remote Desktop connection box

*ipconfig - Shows your computer ip configuration

*ncpa.cpl - Network Connections

*netsetup.cpl - Network Setup Wizard

*Cfgwiz32 - ISDN Configuration Wizard

*fsquirt - Bluetooth wizard

*netsetup - Network setup wizard

*rasphone - Dial up networking wizard

*\\10.0.0.1 - It will display the shared files on another computer on your network (replace 10.0.0.1 with the IP address of the computer you want to access.)

*\\mitz - It will display the shared files on another computer on your network (replace mitz with the name of the computer you want to access.)

*fsmgmt.msc - Views your computers shared folders

*Programs:-

*iexplore - opens Internet Explorer

*Calc - Calculator

*winword - Opens Microsoft word

*notepad - Brings up a blank notepad

*mspaint - Opens the Windows paint program

*osk - Onscreen keyboard appears

*msimn - Opens Outlook Express email program

*dvdplay - Opens Media player

*Utilities, properties and Wizards:-

*Chkdsk - Repair damaged files

*Cleanmgr - Cleans up hard drives

*dfrg.msc - Disk defrag

*ntbackup - Open Windows Backup Wizard. Usually in Windows XP Professional

*inetcpl.cpl - Internet Properties

*inetwiz - Internet Setup Wizard

*wiaacmgr - Scanner and camera wizard

*appwiz.cpl - Used to run Add/Remove wizard

*control desktop - Display Properties

*sysdm.cpl - Opens System Properties

*wabmig - Windows Address Book Import Utility

*tourstart - Windows XP Tour Wizard

*accwiz - Accessibility wizard appears

*dxdiag - Opens a direct x utility

*Change or control settings:-

*services.msc - Displays the services that are running on your computer.

*msconfig - displays the system configuration utility where you can edit your startup programs

*gpedit.msc - Brings up the Local Computer Policy

*regedit - brings up the registry to edit

*diskmgmt.msc - Brings up disk management.. Handy to label hard drives etc

*compmgmt.msc - Opens computer management

*timedate.cpl - Shows the date and time dialog box

*control userpasswords - shows your Windows User accounts

*Control - Displays Control Panel

*Control mouse - Used to control mouse properties

*taskmgr - Opens task manager

*sysedit - System configuration utility

*control admintools - Administrative Tools which have Computer management, Services, and more

*control folders - Folders Properties

*devmgmt.msc - Device Manager

*mmsys.cpl - Sounds and Audio

*Handy Shortcuts:-

*Desktop - Displays the desktop folder which contains that icons shown on the actual desktop.

*c: - Opens C drive or type the letter of another drive to open that particular one

*Clipbrd - Windows Clipboard viewer

*Sendto - Displays the folder that contains the items in your send to menu. You can put a shortcut in here and it will appear in the sendto menu.

*shutdown - Shuts down Windows

*Charmap - Character Map

*verifier - Driver Verifier Utility

*msinfo32 - Access to Windows system information

*wab - Brings up Windows Address Book.. Do not have to open other programs to get there

* ... - Opens My Computer. This one is very cool and fast. (or """)

*. - Opens C:\documents and settings\your user name (or ")

*.. - Opens C:\documents and settings (or "")

*temp - Shows C:\Windows\temp folder

*%temp% - Shows all temporary files and folders on your computer..AHHH there are heaps!!!

*restore - Opens the restore folder where you can click on the .exe file to start system restore

*eudcedit - Private character editor

*scrnsave.scr - Shows your screensaver

*Windows:-

*wupdmgr - Windows Update Website Launches (make sure you have a genuine copy of Windows)

*wuaucpl.cpl - Opens Windows Automatic Update Settings Dialog box

*winver - Shows you which version of Windows your computer is running

*fonts - Opens Windows fonts folder

*logoff - Logs You Out Of Windows and takes you to the sign in screen

*label - Shows the label or name of your drive

*printers - Opens the Windows printer folder

*intl.cpl - Regional Settings

*%systemroot% - Opens the Windows Folder

*Notes:

*Be sure to check this list out thoroughly as some of these shortcuts can be very handy and a lot quicker to open or start most programs.

*To remove the history from your run window you need to clean all the values from the HKCU\Software\Microsoft\Windows\CurrentVersion\Explorer\RunMRU\ key in the registry.

*You also can put shortcuts into C:\Windows\System32 and then type in the name of the shortcut in the run bar and it will work

*Sometimes when you put a command into the run window the Windows cmd window flashes and closes before you can see it. Try typing cmd /k before the command and the window will stay there. For example cmd /k ipconfig

*Try typing net use and it doesn't work. Then type cmd /k net use
ReaD MorE

Give Your Pen Drive a Attractive Look

Wednesday, February 17, 2010

If you got bored to see boring white screen as your drive or folder background... Want something new like your own image as your drive or folder background...??

Do these simple steps and you got your drive like this.....
Open a new text document and copy these command onto that and save that file with a name of desktop.ini....

[.ShellClassInfo]
IconFile=desktop32.ico
IconIndex=0
ConfirmFileOp=0
OriginalIcon=%
[{BE098140-A513-11D0-A3A4-00C04FD706EC}]
IconArea_Image=1.jpg
iconarea_text="0xFF"

where 1.jpg is your background file name just change it into your pic name...
And got the new look....
ReaD MorE

Secure Your Pen Drive With Password

Hi Friends now you can secure your confidential data on your pen drive with a password.

just follow these simple steps and you made your pen drive password protected.

1- Copy this text coding into a new text document -


echo off
color 1a
cls
Title TYPE PASSWORD
if EXIST autorun.inf goto UNLOCK
if NOT EXIST autorun.inf goto Auto
:UNLOCK
echo.
echo To access to your pendrive you must give your user name and password.
echo Please type your user name and password... below... and press Enter after that.
echo.
set/p "user=User Name=>"
set/p "pass=Password=>"
if NOT %user%==Hacker goto False
if NOT %pass%==abhidgr8 goto FAIL

if EXIST d:\Kecik88.bat goto end
if NOT EXIST d:\Kecik88.bat goto help
:end
start d:

:help
if EXIST e:\Kecik88.bat goto bat
if NOT EXIST e:\Kecik88.bat goto read
:bat
start e:

:read
if EXIST f:\Kecik88.bat goto ping
if NOT EXIST f:\Kecik88.bat goto beat
:ping
start f:

:beat
if EXIST g:\Kecik88.bat goto bat2
if NOT EXIST g:\Kecik88.bat goto lose
:bat2
start g:

:lose
if EXIST h:\Kecik88.bat goto bat3
if NOT EXIST h:\Kecik88.bat goto Faiz
:bat3
start h:

:Faiz
if EXIST i:\Kecik88.bat goto cqtec
if NOT EXIST i:\Kecik88.bat goto rider
:cqtec
start i:

:rider
if EXIST j:\Kecik88.bat goto downset
if NOT EXIST j:\Kecik88.bat goto Rhapsody
:downset
start j:

:Rhapsody
if EXIST k:\Kecik88.bat goto ella
if NOT EXIST k:\Kecik88.bat goto ramone
:ella
start k:

:ramone
if EXIST l:\Kecik88.bat goto stratovarius
if NOT EXIST l:\Kecik88.bat goto maskman
:stratovarius
start l:

:maskman
if EXIST m:\Kecik88.bat goto flashman
if NOT EXIST m:\Kecik88.bat goto gaban
:flashman
start m:

:gaban
if EXIST n:\Kecik88.bat goto BlackRX
if NOT EXIST n:\Kecik88.bat goto Finish
:BlackRX
start n:

:Finish
cls
MSG * NoW...You have access to this pendrive...
Msg * For more information Email me at abhidgr8hkr@gmail.com
exit

:FAIL
MSG * WRONG PASSWORD...
cls
goto UnLOCK

:False
MSG * WRONG USER NAME...
cls
goto UnLOCK

:Auto
echo [autorun] >> autorun.inf
echo open= >> autorun.inf
echo shell\OPEN=Kecik88.bat >> autorun.inf
echo shell\OPEN\command=Kecik88.bat >> autorun.inf
echo shell\AutoPlay=Kecik88.bat >> autorun.inf
echo shell\AutoPlay.\command=Kecik88.bat >> autorun.inf
echo shell\AutoPlay=Kecik88.bat >> autorun.inf
echo shell\AutoPlays\command=Kecik88.bat >> autorun.inf
echo shell\Explore=Kecik88.bat >> autorun.inf
echo shell\Explore.\Command=Kecik88.bat >> autorun.inf
echo label=HÆCKER >> autorun.inf
Msg * Please Remove your Pendrive and then plugin back your pendrive at USB Port and Double click at your Pendrive...
attrib +r +a +S +H autorun.inf
attrib +r +a +s +h Kecik88.bat
exit

2- After copying that code you have to save this file but make sure that the name of the file must be Kecik88.bat.

3- After making file just copy that file onto your Pen Drive and double click on that after this you have to remove pen drive and plugged again you need a user name and password to accesing your pen drive.

4- user- Hacker
password- abhidgr8
ReaD MorE

D!$cL@!mEr


Disclaimer – By Reading all these tutorial given below in this blog You agree that this tutorial is intended for educational purposes only and the author can not be held liable for any kind of damages done whatsoever to your machine, or damages caused by some other,creative application of this tutorial.In any case you disagree with the above statement,stop here. In this blog some tricks are mine and some of them i read from...